Inhaltsverzeichnis
Using KeePassXC in the TightGate-Pro
The programme KeePassXC is a locally running password manager for the secure storage and management of login details in an encrypted database. The database is file-based and is stored locally on TightGate-Pro; therefore, no cloud connection is required.
Installation
To run KeePassXC on TightGate-Pro, the programme must be installed separately. Please note that for TightGate-Pro clusters, the programme must be installed individually on each node beforehand. The installation is carried out as follows:
- Log in as an administrator update and select the menu item Add optional packages.
- The optional package webext-keepassxc-browser and install it. (The package contains both the KeePassXC programme and the KeePassXC browser add-on for Firefox. The KeePassXC extension for Google Chrome must be added manually.)
Hinweis
The official documentation (in English) for KeePassXC can be accessed here: https://keepassxc.org/docs/KeePassXC_UserGuide
Getting started and user interface
Once installed, KeePassXC launches automatically when you open the TightGate-Viewer. If you are launching KeePassXC for the first time, you will need to create a new database or link to an existing one.
Creating a new database
- Database > New Database
- Enter a name and description
- Select encryption settings (default recommended)
- Define the master password: (Master password)
👉 Best practices:- At least 12–16 characters
- A mix of upper- and lower-case letters, numbers and special characters
- Do not reuse passwords
- The file is saved as a .kdbx file in the folder transfer folder: Example: internet-pw.kdbx
Using an existing database
If an existing database is to be used, it must first be placed in the user’s ‘transfer’ directory via the TightGate-Schleuse.
The database can be transferred either by the admin transfer or by the users themselves. If users are to transfer the database themselves, care must be taken to ensure that the MIME type application/octet-stream is enabled.
An existing database is used in KeePassXC as follows:
- Database > Open
- Select database (.kdbx file)
- Enter master password
Configuring KeePassXC
The following values should be set differently from the default settings in KeePassXC under Tools > Preferences :
| In the General > Programme Start | |
| Menu item | Recommended value |
|---|---|
| Start KeePassXC automatically at system start | Yes |
| Minimise window on programme start | Yes |
| Minimise window after unlocking the database | Yes |
| In the category General > User Interface | |
| Menu item ‘ | ’ Recommended value |
| Minimise instead of closing the programme | yes |
| Show taskbar icon | yes |
| Taskbar icon | Colourful |
Browser integration
To enable the Firefox / Chrome browser to use the KeePassXC password database directly, it must be enabled in the respective browser. Here’s how to enable it:
- Tools > Preferences > Browser Integration
- Menu item Enable browser integration *In the menu item
- Under Enable integration for these browsers , enable the following browsers: Firefox and, if required, Google Chrome.
- With OK to confirm.
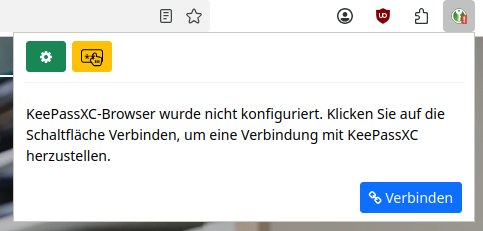
- In the Firefox / Chrome browser, open the keepassxc extension and click the Connect button.
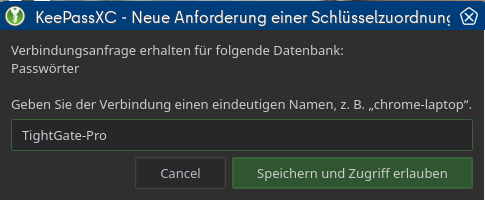
- In the KeePassXC extension, give the connection a unique name and click the Save and Allow Access button to confirm the connection to the KeePassXC database.